背景
最近在Jenkins上编译react工程的时候老是会卡在“Creating an optimized production build…”这一步上很久,最后失败掉。
1 | ...... |
到控制台上查看,每次都是爆内存,除了树莓派3b的1G内存,设置在tf卡上2G的虚拟内存也占掉了4-500M,原本以为慢点儿无所谓,等就是了,这次发现是连等都不行了。

一度想下手树莓派4b,不过近500¥的价格实在是不美丽,而且都需要用风扇来主动散热了,不喜欢……

然后看见了Intel系准系统,6W功耗的赛扬N4000,支持SATA 3.0,更便宜的价格下甩树莓派性能不要太远,恰好手上还有升级换下来的笔记本4G内存条跟120G固态硬盘,要不是因为周末客服不上班无应答,可能一冲动就真下单了。
解决方案
最后想想,反正每次开发要么是开着台式机,要么是开着MBP,干脆加个Slave节点得了,还省钱。
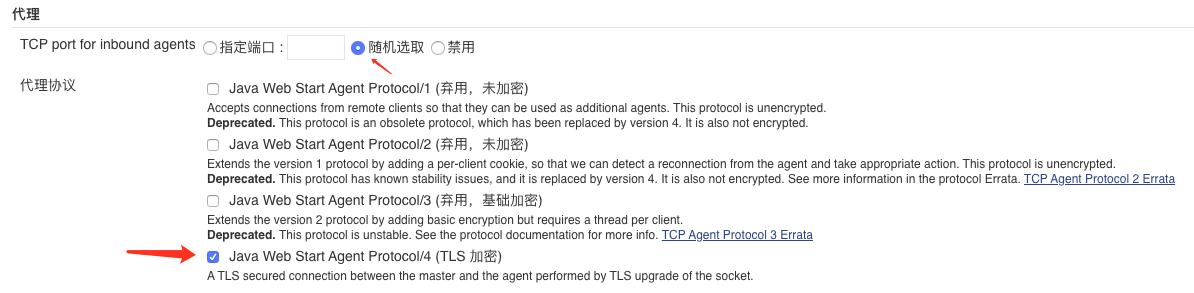
1、 首先需要确认打开Jenkins代理的连接配置:Manage Jenkins –> Configure Global Security –> 代理协议
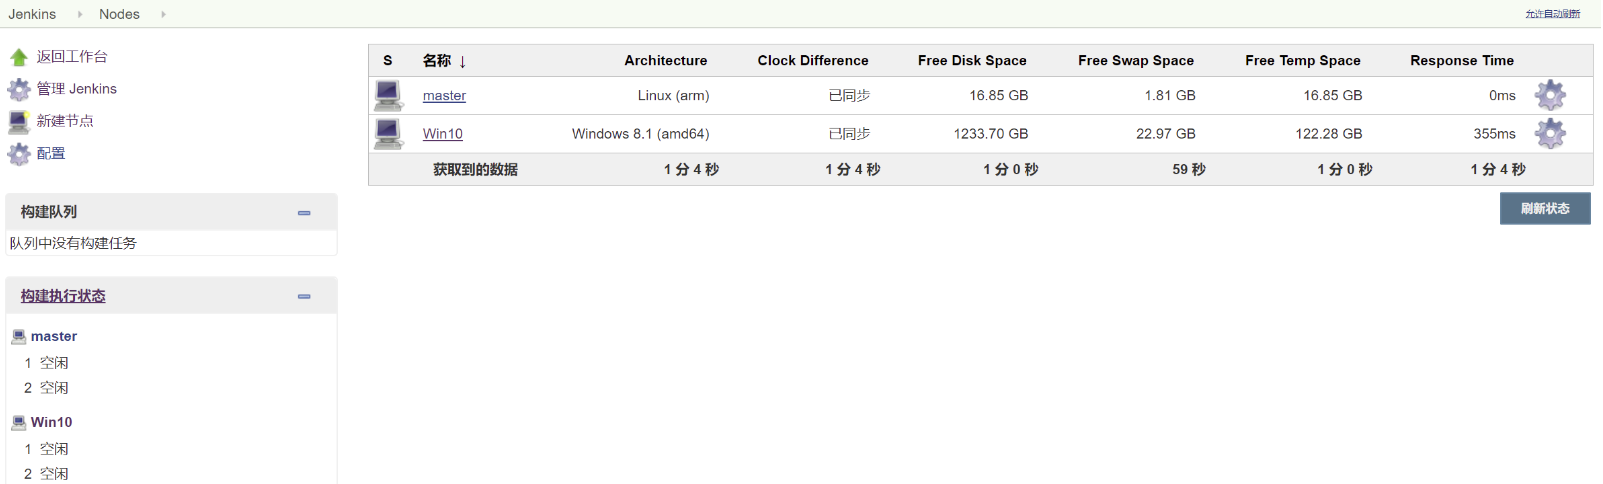
2、新建配置节点:Manage Jenkins –> Manage Nodes –> 新建节点
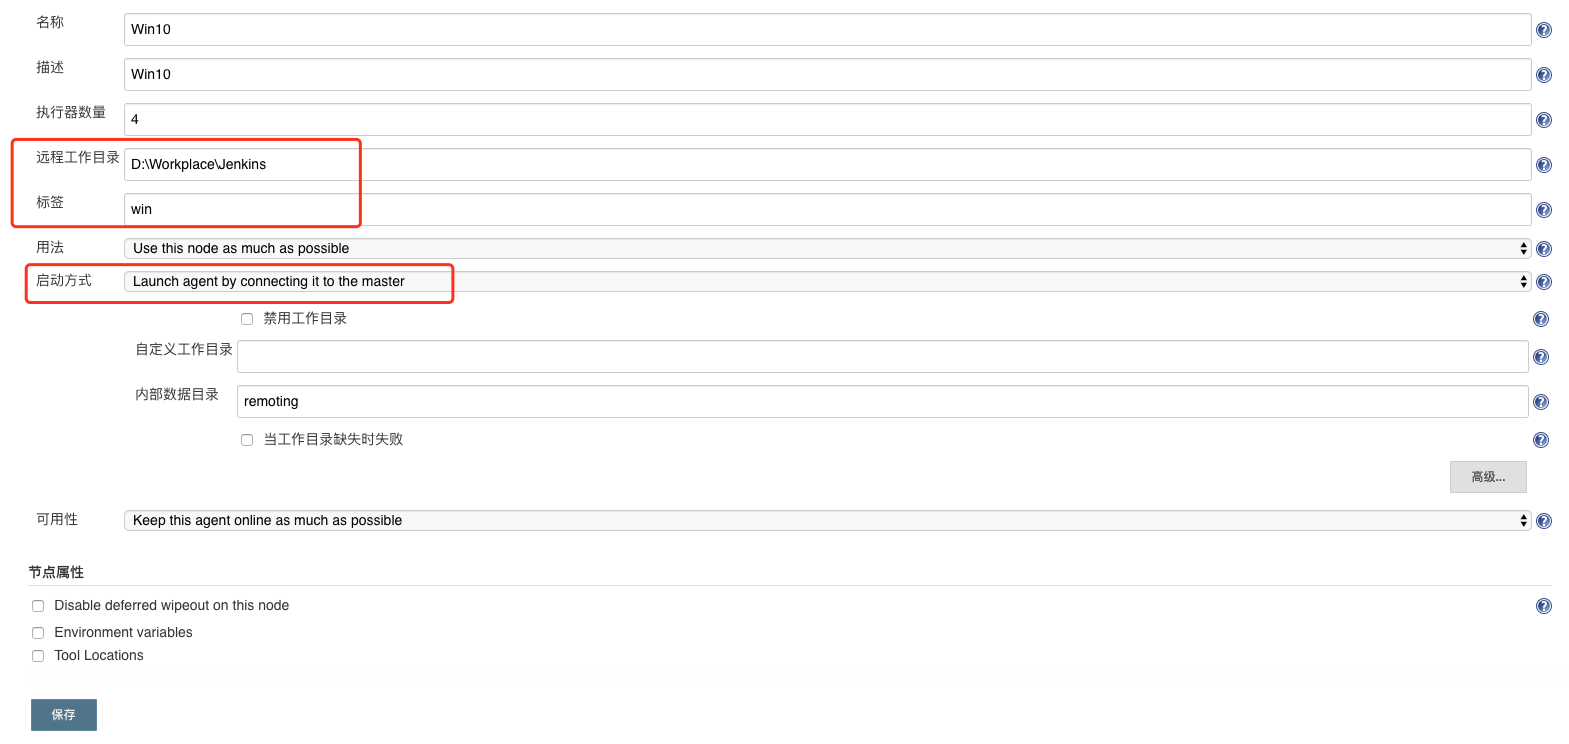
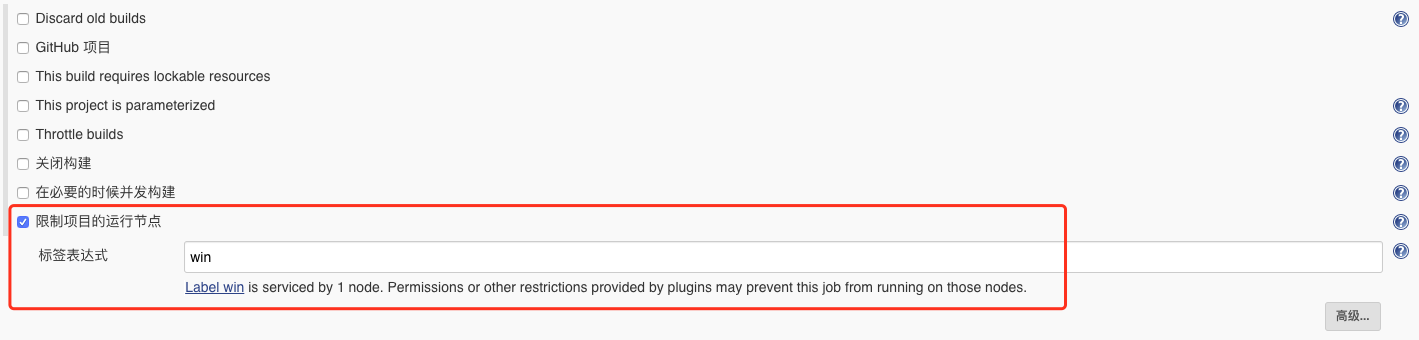
打上标签,方便后续的任务关联
3、 从节点列表点击新增加的节点机器,从页面上下载agent.jar
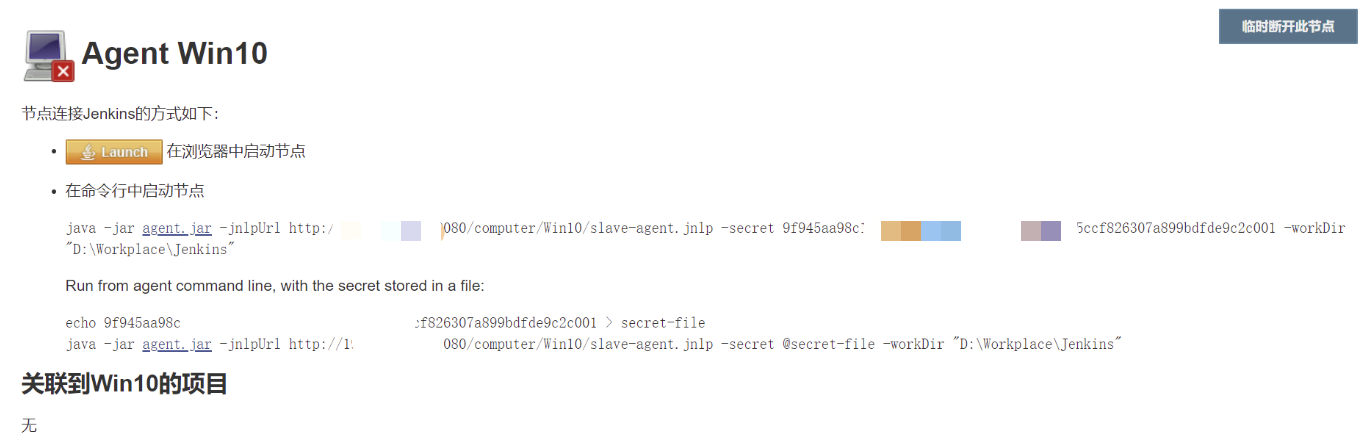
4、在Windows机器的工作目录新建jenkins.bat,将页面上的启动命令复制进去,同时把工作目录加入path环境变量,然后在运行下使用jenkins命令启动代理连接
1 | java -jar agent.jar -jnlpUrl http://xxx.xxx.xxx.xxx:8080/computer/Win10/slave-agent.jnlp -secret xxxxxxxxx -workDir "D:\Workplace\Jenkins" |
5、在原有react构建任务的基础上复制一个新任务,修改标签,指定使用新的Windows节点机器运行
6、移除构建下的“Execute shell”,改为适配Win环境的“Execute Windows batch command”
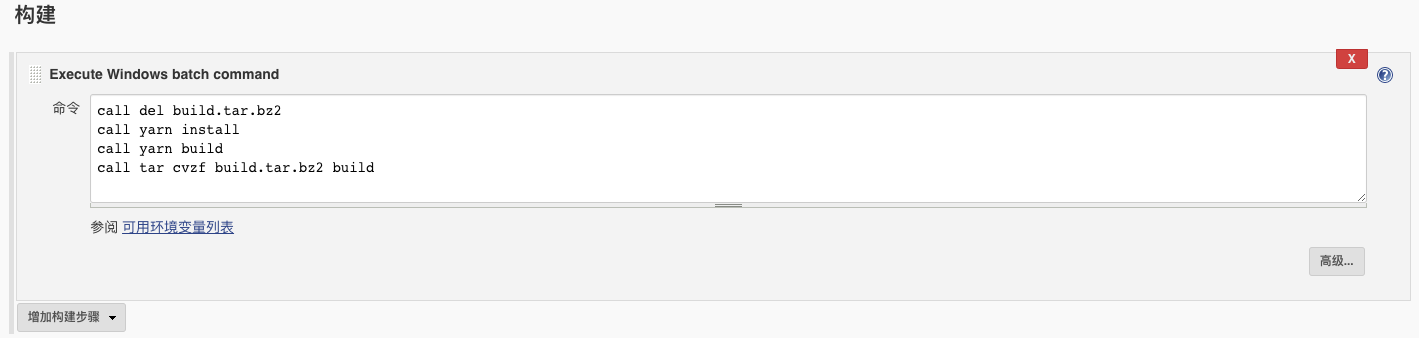
接下来点击构建,就可以享受飞快的构建体验了,从之前的15分钟还无法完成,提升到了46秒😺